Showing posts with label dessert. Show all posts

Thursday, October 1, 2009

Chocolate Espresso Fudge Cake

So here's the deal.  I don't post a lot because I'm waiting to make something worth posting or getting the right picture of it to post.  I'm done with all that.  The great food bloggers of today did not start out perfect.  This is a total learning process.  Practice.  Failure.  Success.  It really doesn't matter.

I look at the blogs that I love and they have three things in common.  Great food/recipes, great pictures, and personality!  Speaking of personality this recipe comes from Jen at Use Real Butter.  Yes, she posts STUNNING pictures and amazing food but she is also super witty and is a great read.  

The moral of my disjointed story?  Blog readers come to a blog to see a great recipes and pictures and stay for the person.  So here I am world!  I'm a 22 year old working a 9-5 in Florida.  I love to dance and bake.  If I go a week without baking something I get a little crazy...just ask my family!

So without hesitation I present to you the Chocolate Espresso Fudge Cake...

This cake came together very nicely.  Of course, as usual, I started it after dinner and was putting on the final touches after midnight.  
I think my favorite part of this cake (besides the icing pattern on top!) was the textural difference between the buttercream and the ganache.  The middle layer was iced with the ganache.  It just had a thick, decadent taste and feel to it.  I used 60% dark chocolate for the ganache.  It was a good choice.  It kept it rich without being overwhelmingly sweet.  
The dots on the top were just fun to eat as the smooth and creamy buttercream combined with the think, rich ganache.
A piped ring of buttercream was a must to keep the ganache from escaping.

Crumb coat!

I used my cake leveler to make a grid for piping the top.  
My grid wasn't perfect but it was close enough.  

I was so happy with this cake.  It is one of the prettiest things I've ever made (in my opinion) and it tasted of pure happy.  If you ever try it you won't be disappointed!

Wednesday, April 22, 2009

Tiramisu Macarons

This was my first attempt at the notorious macaron.  I found the recipe on tastespotting.com (aka, the best site ever!)


I will admit, they weren't even close to perfect...but they were GOOD!  I highly reccomend the recipe.  I had to make my own almond flour (above), but other than that, it was an easy/fastish recipe.
I didn't get feet.  And my macarons didn't flatten out at all really.  The batter was too dry.


But let me tell you, the flavor delivered!  I used marsala wine instead of rum in the filling.


Tiramisu Macarons (recipe adapted from L. A. Times then by Weeva then by Sarah at SweetEndeavors)
* 1 c + 3 tbsp almond flour
* 2 c + 3 tbsp powdered sugar
* 4 egg whites
* 3/4 tsp cream of tartar
* 4 scant tbsp sugar
* 1/4 c instant espresso (more if you prefer a stronger flavor)
* Mascarpone Filling (recipe below)
* 6 oz dark chocolate, shaved

Line two 17-by-12-inch baking sheets with parchment paper and set aside (you may want to fold over the edges to keep the paper flat). In a food processor or coffee grinder, grind instant coffee granules into powder.

In a food processor, blend the almond flour, powdered sugar and coffee for 1 minute. Sift the blended almond mixture directly into a medium mixing bowl. Set aside. (This can be made up to 2 days in advance.)

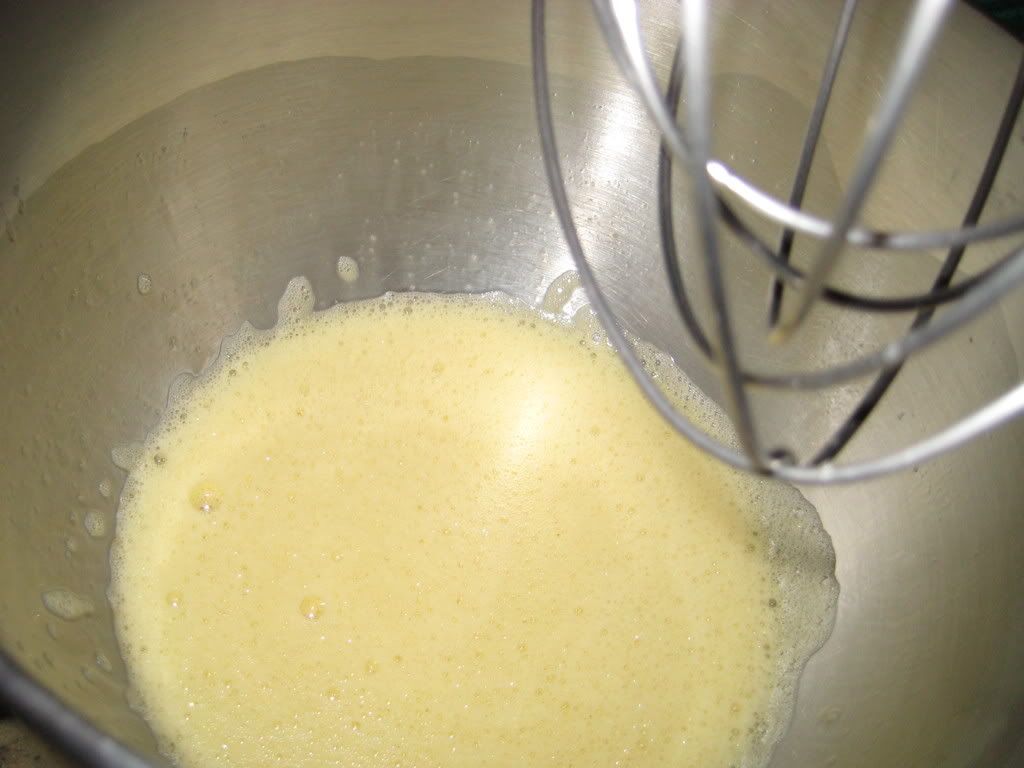
Fill a small saucepan halfway with water. Bring to a simmer, then remove from the heat. In the bowl of a stand mixer, whisk the egg whites until foamy. Place the bowl over the pot of hot water and whisk quickly until the egg whites reach 100 degrees on a candy thermometer.

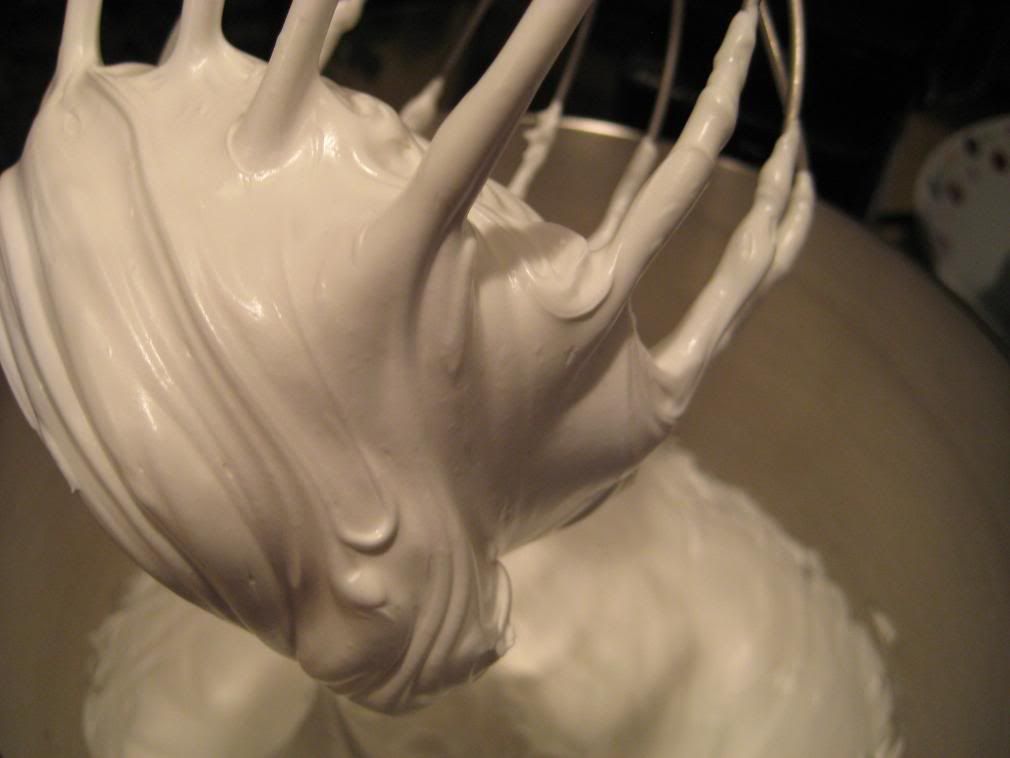
Remove the bowl from the pot of water and whisk in the cream of tartar. Place it on a stand mixer fitted with the whip attachment. Whip on medium speed for 2 minutes, then gradually beat in the sugar. Continue whipping for 6 minutes until the egg whites come to medium stiff peaks (tips droop only very slightly) and are shiny.

Remove the bowl from the mixer. Add egg whites to the almond mixture by gently bringing the flat side of a rubber spatula through the center of the egg whites and up the opposite side of the bowl, folding the dry ingredients over the egg whites. Repeat the same motion 50 times, turning the bowl a quarter turn each time.

Fit a pastry bag with a medium round tip (No. 4) and fill with the mixture. On the parchment-lined baking sheets, pipe 1.5-inch rounds (the batter will be slightly wet) by holding the bag at a slight angle and releasing small amounts of batter. Allow one-half inch between cookies; they will spread slightly.

Keep the piped cookies at room temperature, uncovered, for 1 to 2 hours. (This will help form a skin.) If in a high humidity area, place cookies in oven turned off but with oven light on. Remove cookies from oven and heat to 325 degrees, placing the racks in the center and lower shelves of the oven.

Bake the macarons for 12 minutes, reverse the trays on the racks and rotate. Bake 8 to 10 minutes more, or until firm and not wet. Cool on a rack.

Mascarpone Filling:
* 6 oz mascarpone cheese, softened
* 6 tbsp butter, softened
* 1-1 1/2 c powdered sugar
* 1/4 c marsala wine

In a stand mixer, beat the mascarpone cheese until smooth, 1 minute. Add butter and rum and mix until incorporated. Slowly add powdered sugar to mixer, until filling is thick without being stiff. (The mascarpone should outweigh the sugar flavor.)

Assembly:
Match up fully-cooled macarons for size and shape. Pipe filling on bottom macaron and sprinkle with shaved chocolate. Place top macaron on chocolate and press lightly.

Friday, October 31, 2008

Ghost Poo

Well, my first attempt at making a carved caked was a total fail!  Ha ha.  I wanted to make it tapered like a topsy turvy cake.  Well, that sorta worked.  I filled it with a Kahlua mousse and topped it with buttercream.  So far, so good (not great, but good)

Then came the modeling chocolate.  Sounds simple... 10oz chocolate chips melted, 1/3cup corn syrup.  Mix, chill.  Mold.

This stuff turned to goo as soon as I touched it.  Then it hardened as soon as it hit the cake or I put it down.  My original plan for the cake was to have "fondant-type" circles and maybe fondant lollipops or a spider or two.  Simple.  Cute.

When the modeling chocolate failed I decided to go with it.  (Since it was already after midnight and I had work in the morning)  It would have taken less time to just make some marshmallow fondant and do it right.  So, I used the drippy chocolate to "drip" down the side of my cake.  Why?  I don't know.  It was late.  Then I decided I didn't like how the top of the cake looked so I ripped off some of the slime puddles (and cake and icing that had adhered to it)  Now I was left with a big hole.  Hmmmm, I thought, I should make a stand up ghost.

Word to the wise...NEVER MAKE A CHOCOLATE GHOST!!!!  


Now my cake has a giant turd with eyes and a creepy smile.  Great.  Oh well.  It's 1:30 am by now.  I go to put it in the outside fridge...It doesn't fit.  Solution?  Smash the turd down about an inch.  Now I have a smashed turd with smooshed eyes and a creepy smile.
This morning I open the fridge to find the cake has cracked around the turd in two places.  Oh well, I will either make a bit of marshmallow fondant tonight before the party to make a proper white ghost, or I will serve the turd cake in all its glory.

Please, enjoy.  And laugh.  I am!

Friday, October 24, 2008

French Toast Marshmallows


A few weeks ago I found this recipe on slashfood.com 

I had never attempted marshmallows but I had to give them a try.  My first batch were made with vanilla extract and a scrapped vanilla bean.  They were delicious!  Marshmallows are much easier to make than I thought.  

I am not a huge fan of marshmallows in general, or so I thought.  One bite of these babies and I am hooked!  Homemade marshmallows shouldn't even be compared to "JetPuffed" or the like.

So then the wheels started turning.  What kind of flavors could I use?  Chocolate didn't appeal to me since I prefer ooey gooey warm chocolate things than just a chocolate flavor.  With fall approaching I wanted to use a fallish flavor.  (I wouldn't know it was fall by the weather since in South Florida we only have two seasons: blisteringly hot, and hot.)  I decided that I needed maple marshmallows.  I had recently purchased maple extract from Vanilla, Saffron Imports.  I used close to a tablespoon.  I didn't measure.  I just did it by taste (sorry!)  Then I dusted them in the cornstarch/powdered sugar/cinnamon mixture.  

They were a hit!  People told me they tasted like French Toast with the maple and cinnamon flavors.

So thus was born the French Toast Marshmallow
(Don't forget to toast a few with the ole' Creme Brulee Torch!)

French Toast Marshmallows

.75-oz unflavored gelatin (3 envelopes of Knox gelatin)
1/2 cup cold water
2 cups granulated sugar
2/3 cups light corn syrup
1/4 cup water
1/4 teaspoon salt
1 tablespoon maple extract 

Line 9 x 9-inch pan with plastic wrap and lightly oil it. Set aside.
In the bowl of an electric mixer, sprinkle gelatin over 1/2 cup cold water. Soak for about 10 minutes.
Meanwhile, combine sugar, corn syrup and 1/4 cup water in a small saucepan. Bring the mixture to a rapid boil and boil hard for 1 minute.
Pour the boiling syrup into soaked gelatin and turn on the mixer, using the whisk attachment, to high speed. Add the salt and beat for 12 minutes. After 12 minutes, add in the vanilla extract beat to incorporate. 
Scrape marshmallow into the prepared pan and spread evenly (Lightly greasing your hands and the spatula helps a lot here).  Refrigerate mixture for about an hour  (or let mixture sit out covered for a few hours, or overnight,) until cooled and firmly set.
In a shallow dish, combine equal parts cornstarch and confectioners' sugar and 1/2 teaspoon (or less, to taste) cinnamon. Remove marshmallow from pan and cut into equal pieces with scissors (the best tool for the job) or a chef's knife. Dredge each piece of marshmallow in confectioners' sugar mixture. 
Store in an airtight container.

Makes about 40 large marshmallows, depending on the size you choose to cut them.

Tuesday, September 16, 2008

Daring Bakers August - Better Late Than Never!

So yeah, I'm not really good at deadlines.  I had these done mid August, I just never posted.  These were my tropical storm Faye project.  Ok, I won't post the recipe because everyone else has.  I will just post my results.

YUMMMM!!!!

Ok, so you are probably looking for a little more info than yummmm.  
I had never made pate choux before.  I had no problems making it.  It was actually fun!  I piped the dough and put both sheets in the oven and rotated half way through.  Well, one sheet had perfectly puffed eclairs and the other sheet had half puffed and half FLAT!  It was strange.  But, they did not go to waste.  I was able to "inflate" them with the cream.

I made the chocolate pastry cream just like the recipe had it.  I thought it sounded great, so no need to make any changes.  

I had no problems making the cream.  The recipe said to cut the eclairs open and pipe in the cream.  Where's the fun in that?  I stuck a tip on my pastry bag and shoved it in an end of the eclair and filled that baby up!  Way more fun!

Then came the glaze.  I was confused about the glaze.  Make a sauce, then add x, y, z, and dip in the eclairs.  Ummmm yeah, I made a simple ganache and drizzled it on the eclairs.  Simple, delish.

Wednesday, September 10, 2008

First Cheesecake

I know, i haven't "blogged" in quite some time!  Not for lack of subject matter, just lack of time.  I never stop baking.  Just ask my family, friends, and co-workers who curse me when I "force" them to eat my treats!

A few MONTHS ago I made my first cheesecake.  It was a co-worker's birthday and he said that cheesecake was his favorite...so...I made a Turtle Cheesecake!

It had a chocolate crust, topped witha layer of melted caramels and pecans and then chocolate cheesecake.  It didn't even crack!  I didn't think it was done because it just wouldn't set up in the oven.  I left it in for like 20 minutes extra!

After it was cooled I added the chocolate ganache and pecans.  It was quite tasty.  The caramel layer was so good because it became a little chewy.  It's a keeper!


The Recipe was found here!

Turtle Cheesecake

Crust:
24-26 Oreo (or store brand) cookies, crushed
1/4 c. sugar
1/4 c. melted butter

Filling:
30 vanilla caramels
1/4 - 1/3 c. whipping cream

pecans

Cheesecake:
2 (8 oz) pkgs cream cheese
2 (8 oz) pkgs neufchatel cheese
1 1/2 c. sugar
4 eggs
1/2 c. whipping cream
3 oz. unsweetened chocolate, melted
3 oz. semi-sweet chocolate, melted

Ganache:
1/3 - 1/2 c. whipping cream
8 oz chopped chocolate

chopped pecans
caramel sauce (ice cream topping)
whipped cream

Stir together crust ingredients. Press into the bottom of a 10-inch springform pan. Bake at 350 for 10-12 minutes. Cool.

Heat caramels and whipping cream until caramels are melted and smooth. Pour into cooled crust, making sure you don’t spread it completely to the edge of the pan. Leave 1/4-inch band around the edge. Sprinkle liberally with pecans.

In a large mixing bowl, beat the cheeses until smooth and creamy, scraping the sides often; don’t leave any lumps. Add the sugar and beat again. Add the eggs, one at a time, beating until smooth after each addition, scraping the sides and being certain to incorporate any lumps from the bottom of the bowl. Add the whipping cream and melted chocolate and beat until smooth and evenly colored. Pour on top of pecans.

Bake at 325 F for 50 min with a pan of water on the rack below in the oven. Cool completely.

In a small saucepan, heat whipping cream until it simmers. Remove from heat and stir in chocolate until completely melted. Spread over cheesecake.

Garnish with chopped pecans, caramel sauce, and whipped cream. Refrigerate overnight or until serving.


Wednesday, May 28, 2008

Daring Bakers - May Challenge

What an "opera"tunity!

The Daring Bakers are at it again. This month we took on the Opera Cake. The challenge was to create an Opera cake using only light, spring-y colors.

The cake consists of three layers of almond joconde with buttercream in between topped with an optional mousse and a ganache layer.

I chose to use raspberry and lime as my flavors. I added lime zest to the cake, made a lime simple syrup to moisten the layers, and then strained the juice from a bag of frozen raspberries to add to the buttercream (classy, right?) I used my own version of fool-proof, no-cook buttercream.


So here's the verdict:
Problems - I made the buttercream and then added the raspberry juice. It was about a 1/2 cup of extra liquid. This made the buttercream runny...So I added more sugar.
I attempted to make the mousse but when I added the almost cooled white chocolate to the whipped cream it turned very lumpy and greasy. So I tossed it! The cake didn't need it anyway. Other daring bakers said that they put the mixture into the fridge to set up and then re-beat it. They said it worked great. Oh well!
Taste - Too sweet. I am not a huge fan of white chocolate and the glaze was TOO sweet. The cake tasted the best when served cold. The raspberry and lime flavors were subtle but blended well.
Difficulty - This cake was much easier than I thought it would be. The hardest part was forking out $10 for my almond flour. The joconde came together nicely. I just wish that I had baked them separatly rather than at the same time on different racks. The top one browned a little much on the top with a moist bottom and the bottom layer was too brown on the bottom with a very light top. The glaze poured on nicely. I chilled it and then trimmed the sides of the cake. It cut very well after being chilled.
Overall - Fun challenge...Thank you co-hosts Lis and Ivonne (daring bakers founders) and Franand Shea. I had always wanted to make an opera cake and here it is! I can't wait to make a more traditional one with chocolate and coffee flavors. THANK YOU!
*check out Ivonne's blog for the recipe.

Tuesday, April 1, 2008

Daring Bakers - March Challenge

I joined Daring Bakers and my first challenge was "The Perfect Party Cake"

We were allowed to play around with the recipe as much as we wanted but I stuck pretty close to it. I did use lemon curd as one of my filling layers instead of doing it all raspberry.

To be quite honest I thought the icing was a little heavy for the cake. I had never had a meringue based icing before. It was too buttery.

My layers didn't raise too much but i am now thinking that they aren't supposed to. I know that I cannot cut even layers now!

This cake was fun and it didn't last long at all! I wish I had done a different design on top. Maybe just a raspberry circle.


Frosting
Lemon Curd Filling
Raspberry Filling
Done!


For the Cake
2 1/4 cups cake flour
1 tablespoon baking powder
½ teaspoon salt1
¼ cups whole milk or buttermilk
4 large egg whites
1 ½ cups sugar
2 teaspoons grated lemon zest
1 stick unsalted butter, at room temperature
½ teaspoon pure lemon extract (I read this wrong and used vanilla instead)

For the Buttercream
1 cup sugar
4 large egg whites
3 sticks (12 ounces) unsalted butter, at room temperature
¼ cup fresh lemon juice (from 2 large lemons)
1 teaspoon pure vanilla extract

For Finishing
2/3 cup seedless raspberry preserves stirred vigorously or warmed gently until spreadable
About 1 ½ cups sweetened shredded coconut

Getting Ready
Centre a rack in the oven and preheat the oven to 350 degrees F. Butter two 9 x 2 inch round cake pans and line the bottom of each pan with a round of buttered parchment or wax paper. Put the pans on a baking sheet.

To Make the Cake
Sift together the flour, baking powder and salt.
Whisk together the milk and egg whites in a medium bowl.
Put the sugar and lemon zest in a mixer bowl or another large bowl and rub them together with your fingers until the sugar is moist and fragrant.
Add the butter and working with the paddle or whisk attachment, or with a hand mixer, beat at medium speed for a full 3 minutes, until the butter and sugar are very light.
Beat in the extract, then add one third of the flour mixture, still beating on medium speed.
Beat in half of the milk-egg mixture, then beat in half of the remaining dry ingredients until incorporated.
Add the rest of the milk and eggs beating until the batter is homogeneous, then add the last of the dry ingredients.
Finally, give the batter a good 2- minute beating to ensure that it is thoroughly mixed and well aerated.
Divide the batter between the two pans and smooth the tops with a rubber spatula.
Bake for 30-35 minutes, or until the cakes are well risen and springy to the touch – a thin knife inserted into the centers should come out clean
Transfer the cakes to cooling racks and cool for about 5 minutes, then run a knife around the sides of the cakes, unfold them and peel off the paper liners.Invert and cool to room temperature, right side up (the cooled cake layers can be wrapped airtight and stored at room temperature overnight or frozen for up to two months).

To Make the Buttercream
Put the sugar and egg whites in a mixer bowl or another large heatproof bowl, fit the bowl over a plan of simmering water and whisk constantly, keeping the mixture over the heat, until it feels hot to the touch, about 3 minutes. The sugar should be dissolved, and the mixture will look like shiny marshmallow cream.
Remove the bowl from the heat.
Working with the whisk attachment or with a hand mixer, beat the meringue on medium speed until it is cool, about 5 minutes.
Switch to the paddle attachment if you have one (I forgot this part), and add the butter a stick at a time, beating until smooth.
Once all the butter is in, beat in the buttercream on medium-high speed until it is thick and very smooth, 6-10 minutes. During this time the buttercream may curdle or separate – just keep beating and it will come together again.
On medium speed, gradually beat in the lemon juice, waiting until each addition is absorbed before adding more, and then the vanilla.
You should have a shiny smooth, velvety, pristine white buttercream. Press a piece of plastic against the surface of the buttercream and set aside briefly.

To Assemble the Cake
Using a sharp serrated knife and a gentle sawing motion, slice each layer horizontally in half.
Put one layer cut side up on a cardboard cake round or a cake plate protected by strips of wax or parchment paper.
Spread it with one third of the preserves.
Cover the jam evenly with about one quarter of the buttercream.
Top with another layer, spread with preserves and buttercream and then do the same with a third layer (you’ll have used all the jam and have buttercream leftover).
Place the last layer cut side down on top of the cake and use the remaining buttercream to frost the sides and top.
Press the coconut into the frosting, patting it gently all over the sides and top.

Serving
The cake is ready to serve as soon as it is assembled, but I think it’s best to let it sit and set for a couple of hours in a cool room – not the refrigerator. Whether you wait or slice and enjoy it immediately, the cake should be served at room temperature; it loses all its subtlety when it’s cold. Depending on your audience you can serve the cake with just about anything from milk to sweet or bubbly wine.

Storing
The cake is best the day it is made, but you can refrigerate it, well covered, for up to two days. Bring it to room temperature before serving. If you want to freeze the cake, slide it into the freezer to set, then wrap it really well – it will keep for up to 2 months in the freezer; defrost it, still wrapped overnight in the refrigerator.

Playing Around
Since lemon is such a friendly flavour, feel free to make changes in the preserves: other red preserves – cherry or strawberry – look especially nice, but you can even use plum or blueberry jam.

Fresh Berry Cake
If you will be serving the cake the day it is made, cover each layer of buttercream with fresh berries – use whole raspberries, sliced or halved strawberries or whole blackberries, and match the preserves to the fruit. You can replace the coconut on top of the cake with a crown of berries, or use both coconut and berries. You can also replace the buttercream between the layers with fairly firmly whipped sweetened cream and then either frost the cake with buttercream (the contrast between the lighter whipped cream and the firmer buttercream is nice) or finish it with more whipped cream. If you use whipped cream, you’ll have to store the cake the in the refrigerator – let it sit for about 20 minutes at room temperature before serving.
Red Velvet Cake

I made this cake but i forgot to take a picture of the final cake. But here are a few photos just for kicks!


Brownie Tarts

So I don't really have a recipe for this because I made it up. So I will try to rewrite what I did.

The crusts were simply Gharadeli Chocolate Brownie mix. I used a little more oil and a little less water to make them more dense.

The filling was a ganache. I did 4 different kinds.
I did a raspberry ganache with equal parts (i think!) semi-sweet chocolate chips and cream and I added strained raspberry puree (from frozen raspberries)

The peanut butter filling was pretty much peanut butter and powdered sugar. Think Reeses peanut butter cups.

Then I had a simple white chocolate ganache which ended up being the hardest to make.

And an espresso ganache. Again, semi-sweet chocolate chips, creme, and starbucks double-shot (the little cans)

I filled each tart shell....

and then i piped whipped plain chocolate ganache.

Then i cut them in fourths and served them at work! The End!


Wednesday, March 12, 2008

Baked Hot Chocolate - OMG

So, i saw this recipe yesterday and had to make it. It was either make the dessert or go to the gym. From the evidence below i think you will be able to come to a conclusion of what i chose.

Baked Hot Chocolate

Note: I doubled this recipe. Who only needs 4 servings of amazingness? This dessert was explained on another blog as "an extremely decadent three layer extravaganza. The top layer is crusty almost soufflĂ© like, the middle layer is like chocolate pudding and the last and bottom layer is very thick “liquidy” chocolate." My hot chocolates had a "souffle" crust with a pudding like filling. It seemed to only be two layers. I don't think i baked them long enough. I made them both in a corningware small casserole and in Pampered Chef 1 cup measuring cups. (if you buy one thing from Pampered Chef make it those 1 cup measuring cups!)

Adapted from “Essence of Chocolate” recipe by Heidi Friedlander, makes 4 servings
9 ounces 62% semisweet chocolate, finely chopped
6 tablespoons unsalted butter, cut into cubes
4 large eggs
¼ cup granulated sugar

Position a rack in the middle of the oven and preheat the oven to 350°F. Arrange four ovenproof cups or mugs or 8-ounce ramekins in a baking or roasting pan.
Place the chocolate and butter in the top of a double boiler set over gently simmering water and whisk occasionally until the chocolate has melted and the mixture is smooth. Remove from heat and set aside.

Stir the eggs and sugar together in the bowl of a stand mixer set over the simmering water and stir until warm to the touch.
Place the bowl on the stand mixer and, using the whisk attachment, beat 3 to 5 minutes until light and fluffy.
(Egg mix expands a lot)
Remove from the mixer, and fold the eggs into the chocolate mixture until it is light and smooth.
Spoon the batter into the cups. Add enough very hot water to the baking pan to come halfway up the sides of the cups. Bake for 15 to 20 minutes. The baked hot chocolates will be done when the tops lose their glossy finish. A wooden skewer inserted in the top will emerge but the batter toward the bottom of the cup will still be very moist.
Carefully remove the cups from the pan. The cakes can be served warm, at room temperature or covered and refrigerated for up to 1 day. To reheat, bring to room temperature and place into a preheated 350 °F over for 5 minutes or until warm.
Top with cocoa whipped cream if desired.

The next photo is a funfeti cake made by my brother and his girlfriend. SUGAR RUSH! It was addicting, tylenol was needed!
Ah, yes. The Lebanese Feast! I cannot take credit for this. My friend's mother made us a beautiful dinner of falafel, tzatziki, hummus, meatballs (i dont know what they were called), lemon chicken, tabouleh, etc. It was amaze-za-zing!